
The article contains sections: 
- Create a protocol template from scratch
- How can a doctor create a protocol during an appointment?
- How to change the protocol editing time
- Frequently Asked Questions
- Log in to the Medlock using the username and password of the user who has access to the EHR.
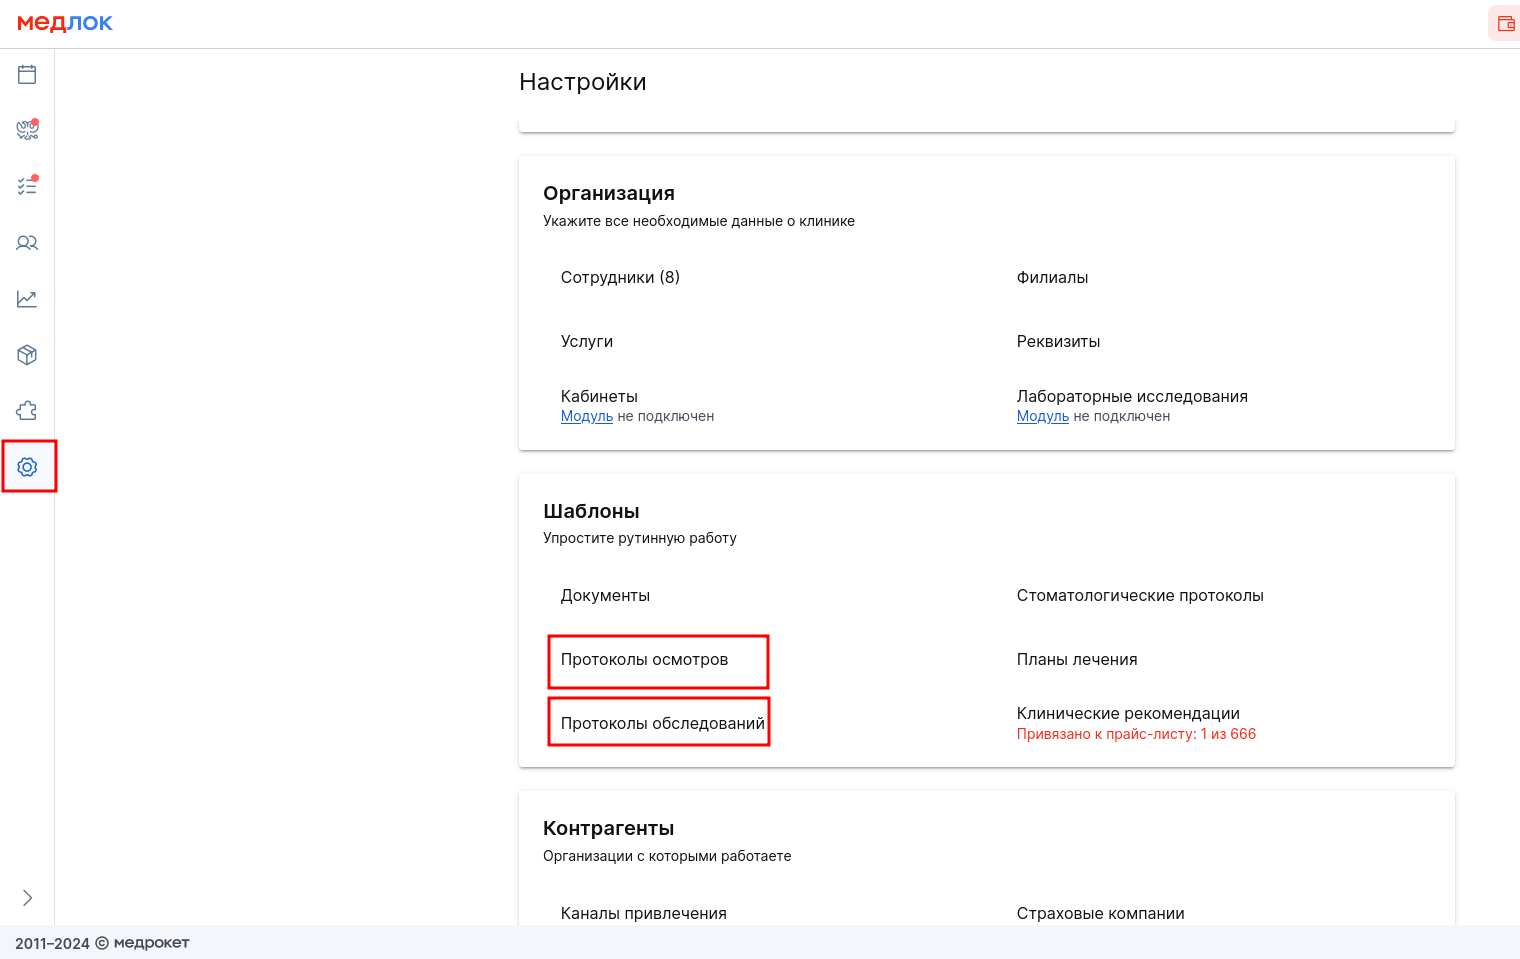
- In the section«Настройки», select «Шаблоны осмотров»or «Шаблоны обследований».
Create a protocol template from scratch
- Click «+ Новый шаблон»in the upper-right corner.

- Enter the name of the template and specify the doctors who will be able to use it. Don't forget to add yourself if you need it too.
In the column«Название протокола», specify the name that the patient will see on the printout.
For example, the template is called «Ангина», but you want it to be in the printout«Прием терапевта», then «Название протокола»write in the field«Приём терапевта».
- If necessary, fill in the remaining fields. You can copy them from templates that you already have.
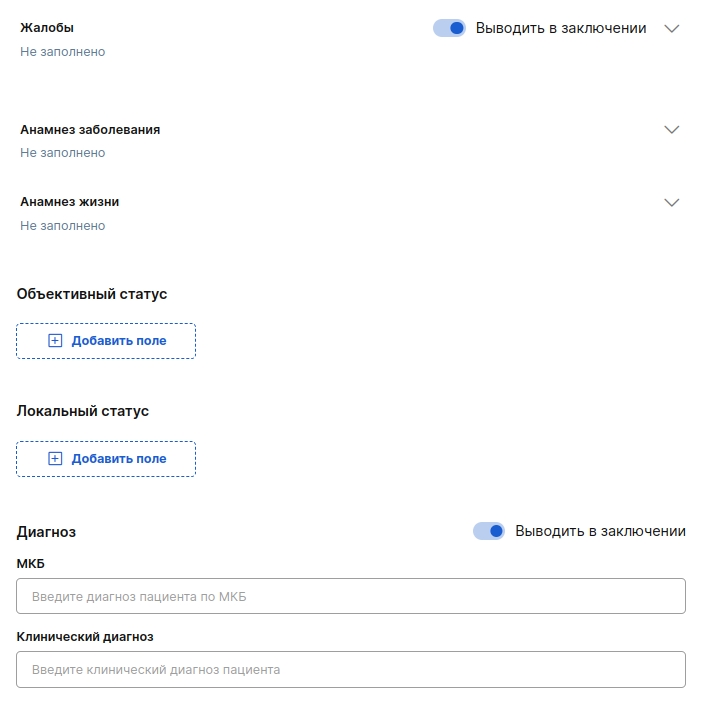
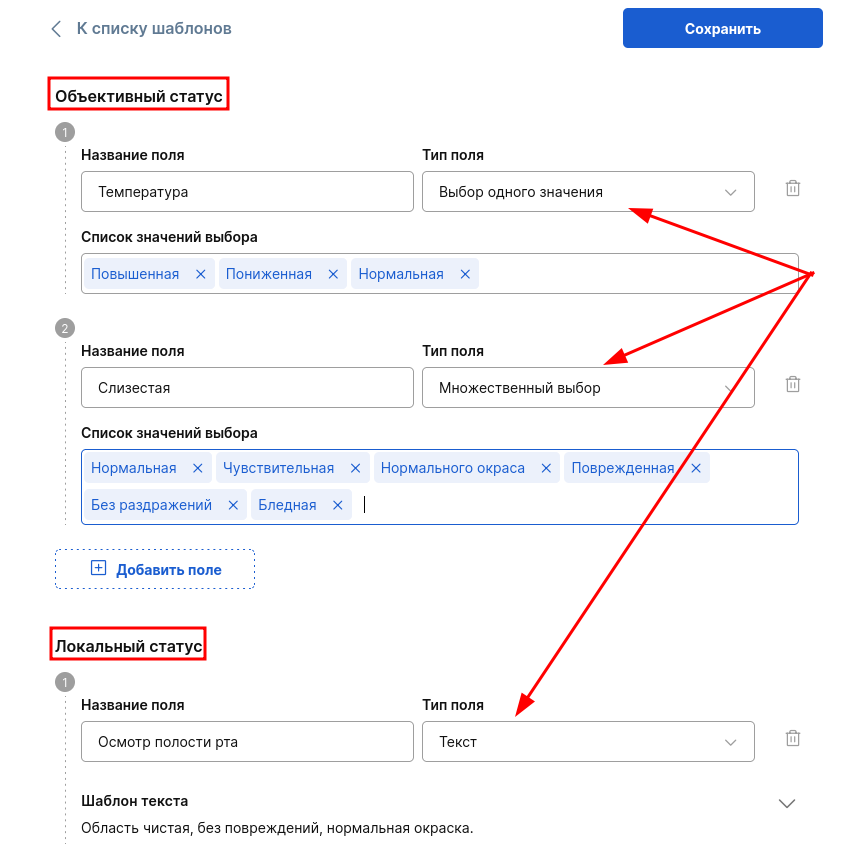
- The sections «Объективный статус»«Локальный статус»are arranged in the constructor format.
4.1 Specify the name of the field.
4.2 «Список значений выбора»Enter a value in the column, for example, «повышенная»(temperature). Press Enter.
4.3 Select the field type:
- Single value selection — when filling out the protocol, you can select only one of the listed values.
- Multiple choice — when filling out the protocol, you can select several items at the same time.
- Text — when filling out the protocol, you will be able to edit the text that you entered in the template. The default text must be specified in the column«Шаблон текста».
- When all the necessary fields are filled in, click «Сохранить»in the upper-right corner.

The general list of templates includes a search bar and the ability to group templates by employee, author, or title.
Any template can be copied by clicking on the copy icon. Only the author can edit or delete the template. To edit it, click on the template name, and to delete it, click on the trash icon to the right of the employee's initials.

To speed up protocol setup for your specialists, use ready-made system templates for basic nosologies.
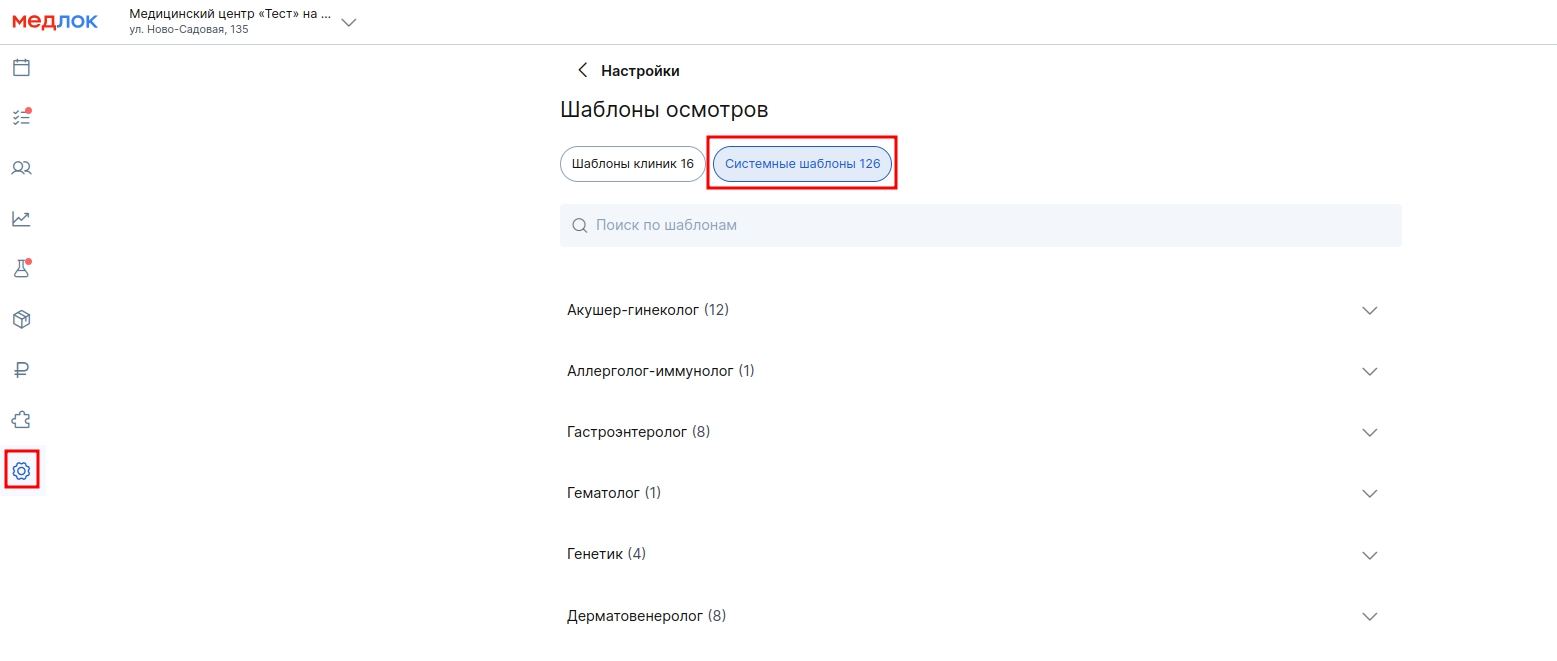
- Go to «Настройки»→ «Шаблоны осмотров»or «Шаблоны обследований»→ «Системные шаблоны».
- Select the system template based on the doctor's specialization and copy it.
- Specify the doctors for whom this template will be relevant.
- If necessary, edit it and save the result.
- You will find the resulting template in the tab«Шаблоны клиники».
In «Шаблоны осмотров»the or sections«Шаблоны обследований», you can select the protocol printing settings (caps).
To do this, click «Настройки»in the upper right corner, you have 4 printing options available.:
- The logo and banking details.
- Just the banking details.
- Just the logo.
- Do not print.

How can a doctor create a protocol during an appointment?
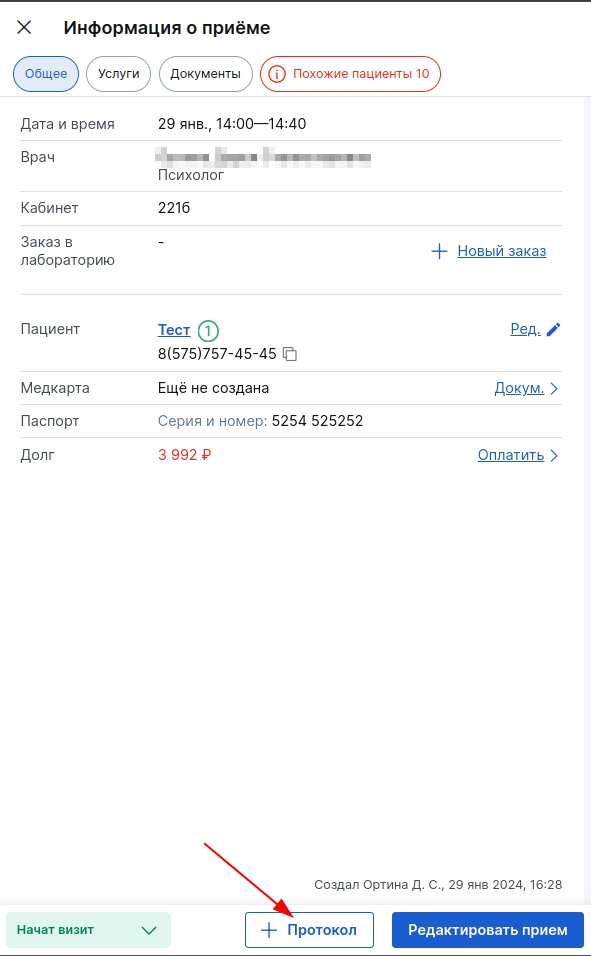
To create a protocol, the patient's application must specify the status«Начат визит». After that, a button will become available«+Протокол», click on it.
Important! The doctor can create a protocol only for those patients who are registered with him.
If the patient has already been to an appointment, you can use the previous protocol as a basis. This way you won't have to fill out your medical history again.
Click on the field «Шаблон протокола»and select the appropriate protocol from the drop-down list.

After completing the protocol, you can immediately print the document to the patient.
When printing the inspection report, two files are generated:
- An abbreviated version is prepared for the patient — a Conclusion.
- A more extended document, the Examination Protocol, will be created for the doctor.
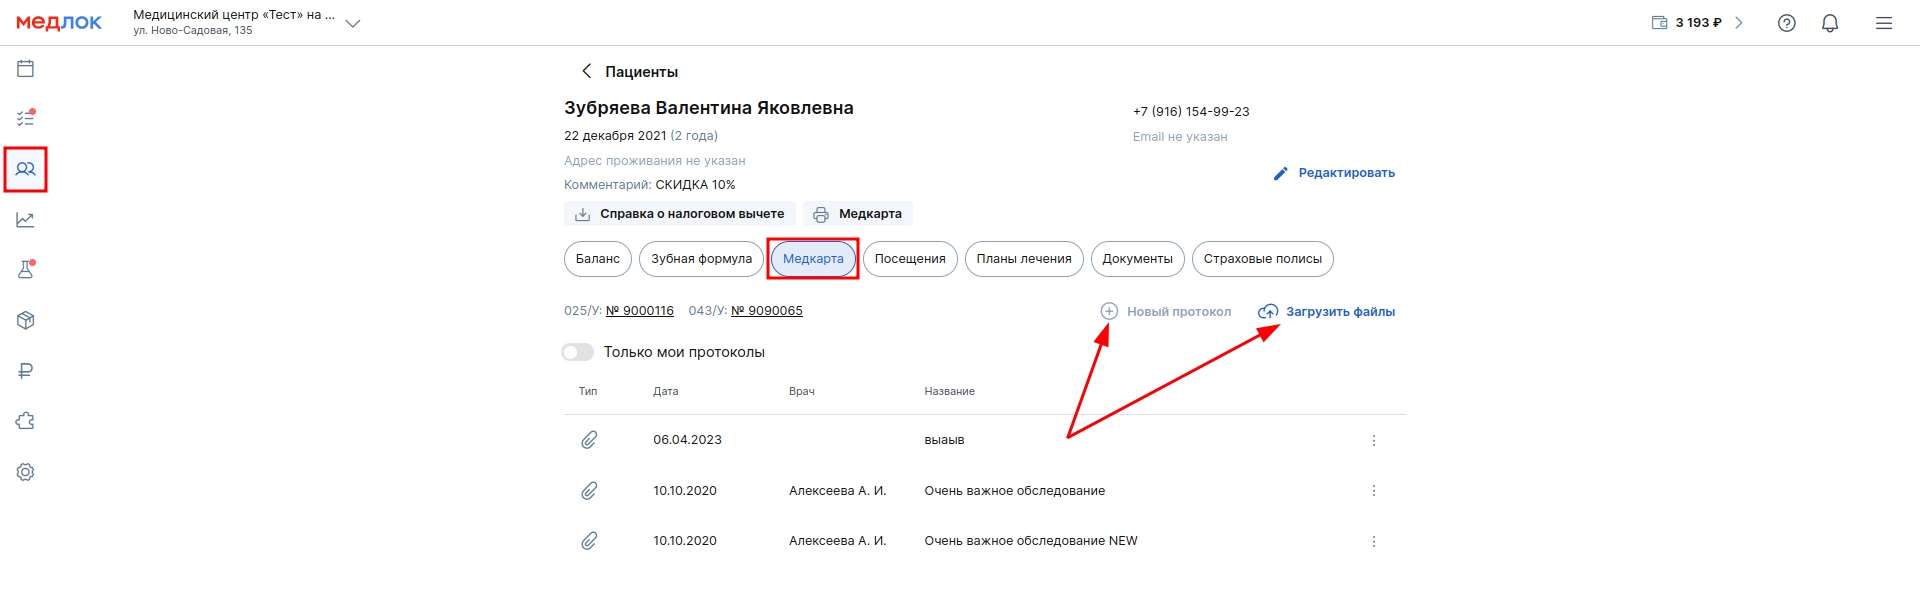
All examinations and examinations performed are saved in the patient's card.
Here you can add one or more protocols, upload files (examinations, X-rays, analyzes, etc.) or print the protocol by clicking on the printer icon.
Important! By default, the doctor can edit documents within 24 hours of the appointment. How to change this setting.
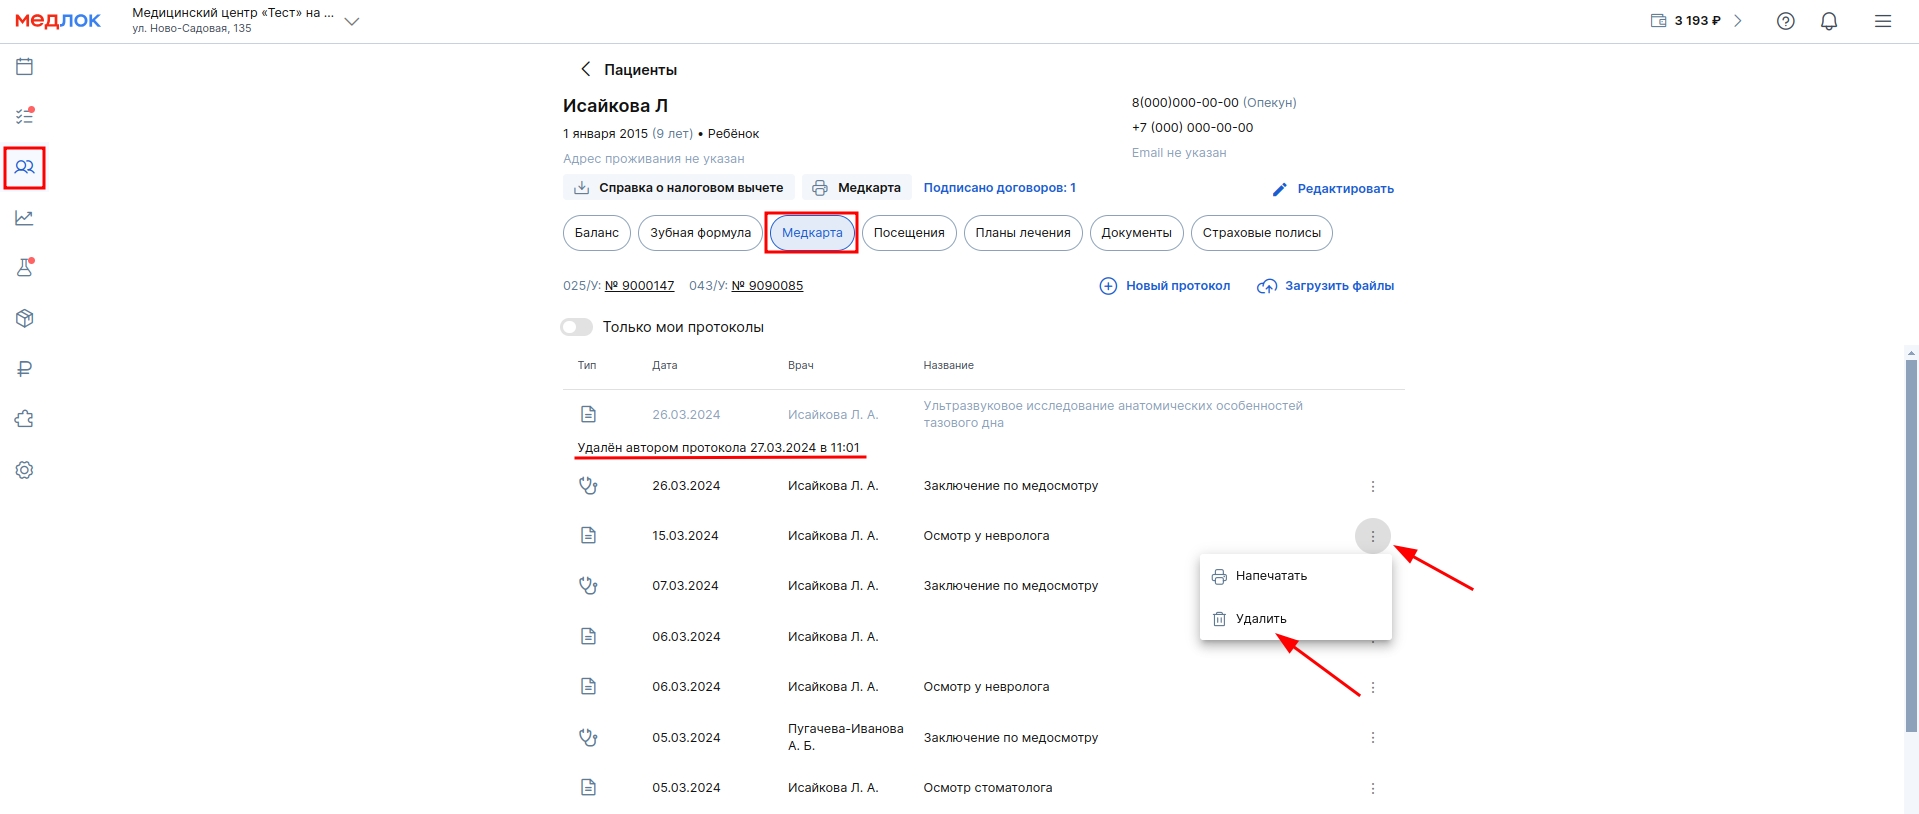
The author of the protocol can delete it by clicking on the trash icon to the right of the name.
The deleted protocol remains in the patient's card with information about the date and time of deletion.
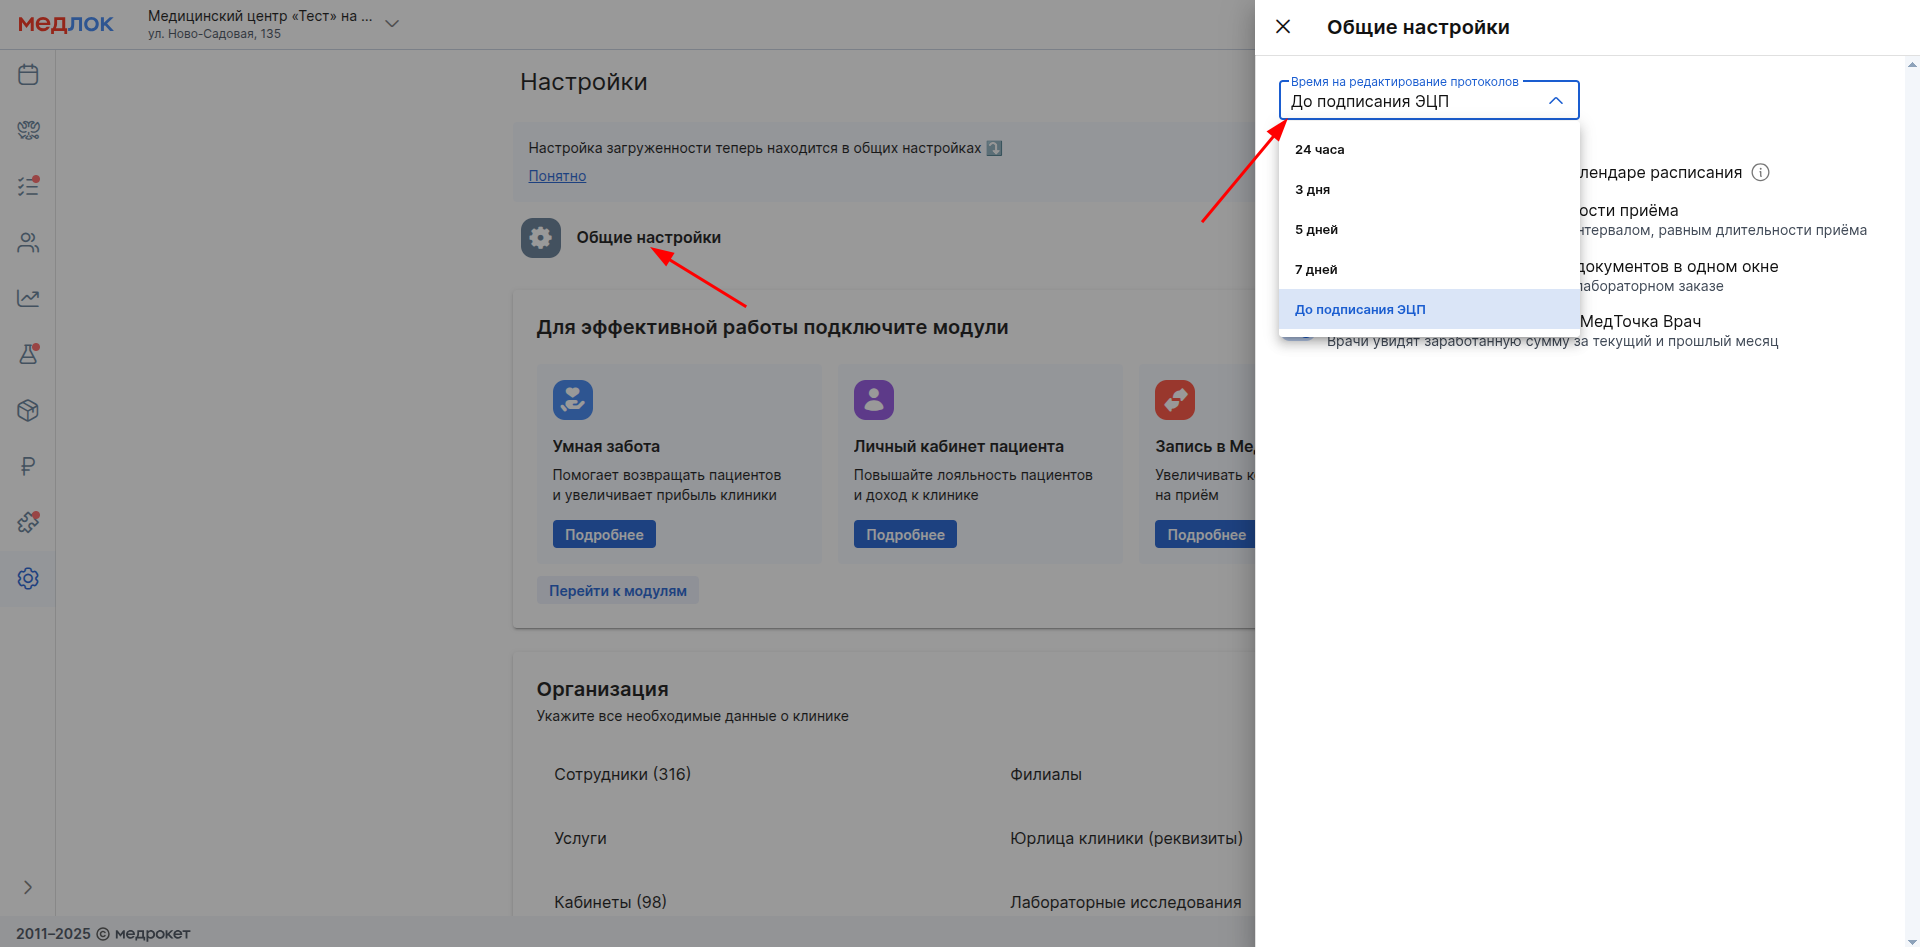
How to change the protocol editing time
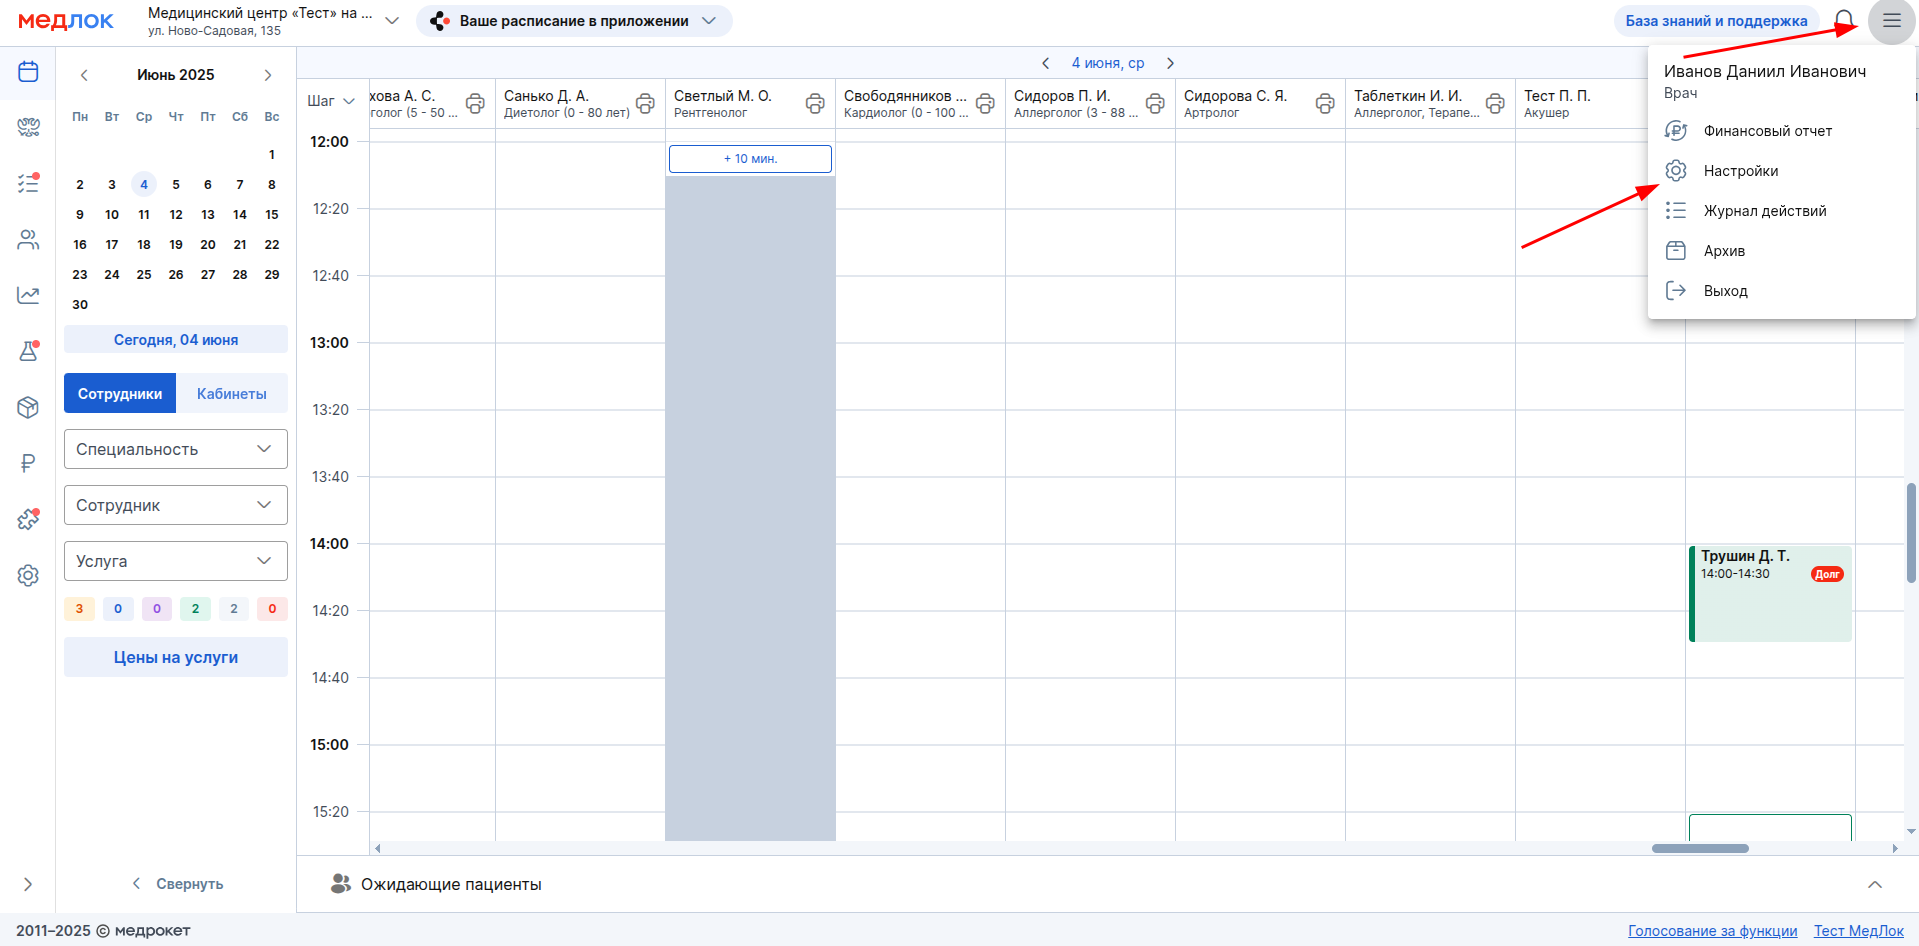
- Go to the section «Настройки».
- Click «Общие настройки»and open the settings «Время на редактирование протоколов». Select the desired time period from the list.
Frequently Asked Questions
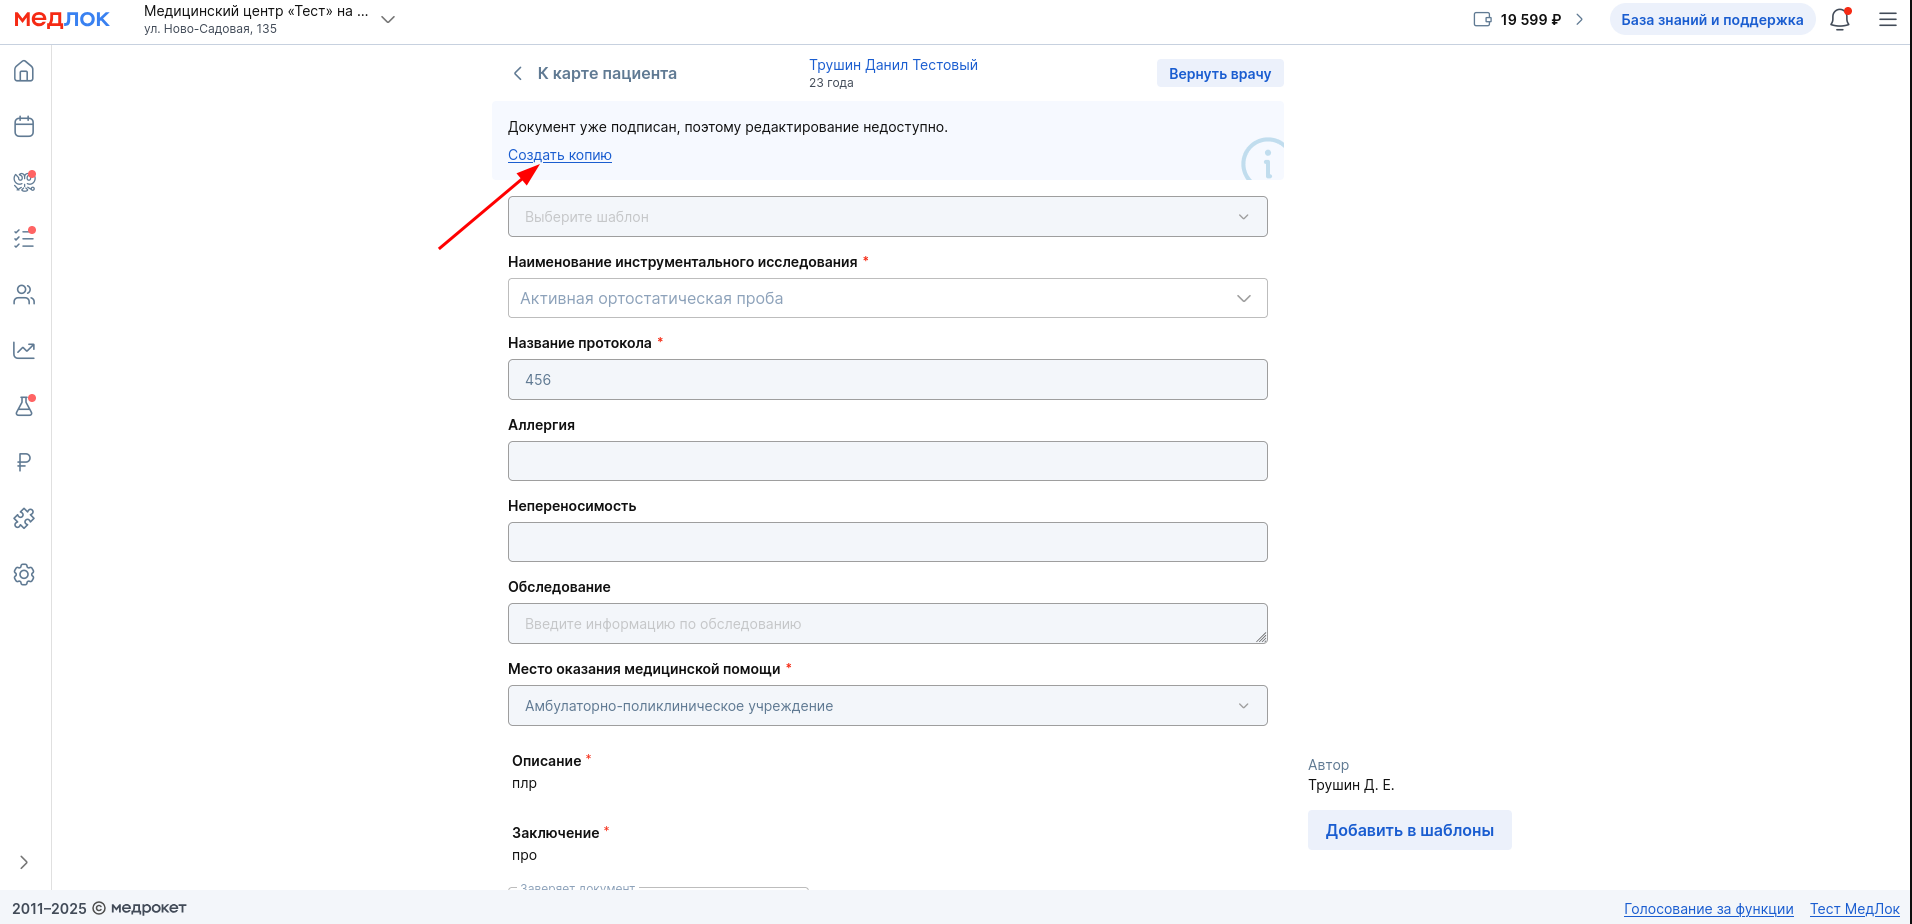
- How do I copy the protocol?
After the protocol is signed by the doctor, it cannot be edited, but a copy can be created. To do this, go to the signed protocol, a message and a button will appear on top«Создать копию».
- How can I remove a service from the examination report for a completed appointment that the doctor added incorrectly?
If the service from the protocol that was mistakenly added has not yet been completed, the doctor can remove it from the protocol within 24 hours or another period that is set in the general settings of the medical device.
If the service is completed, it cannot be deleted. An error will report this when you try to delete it.
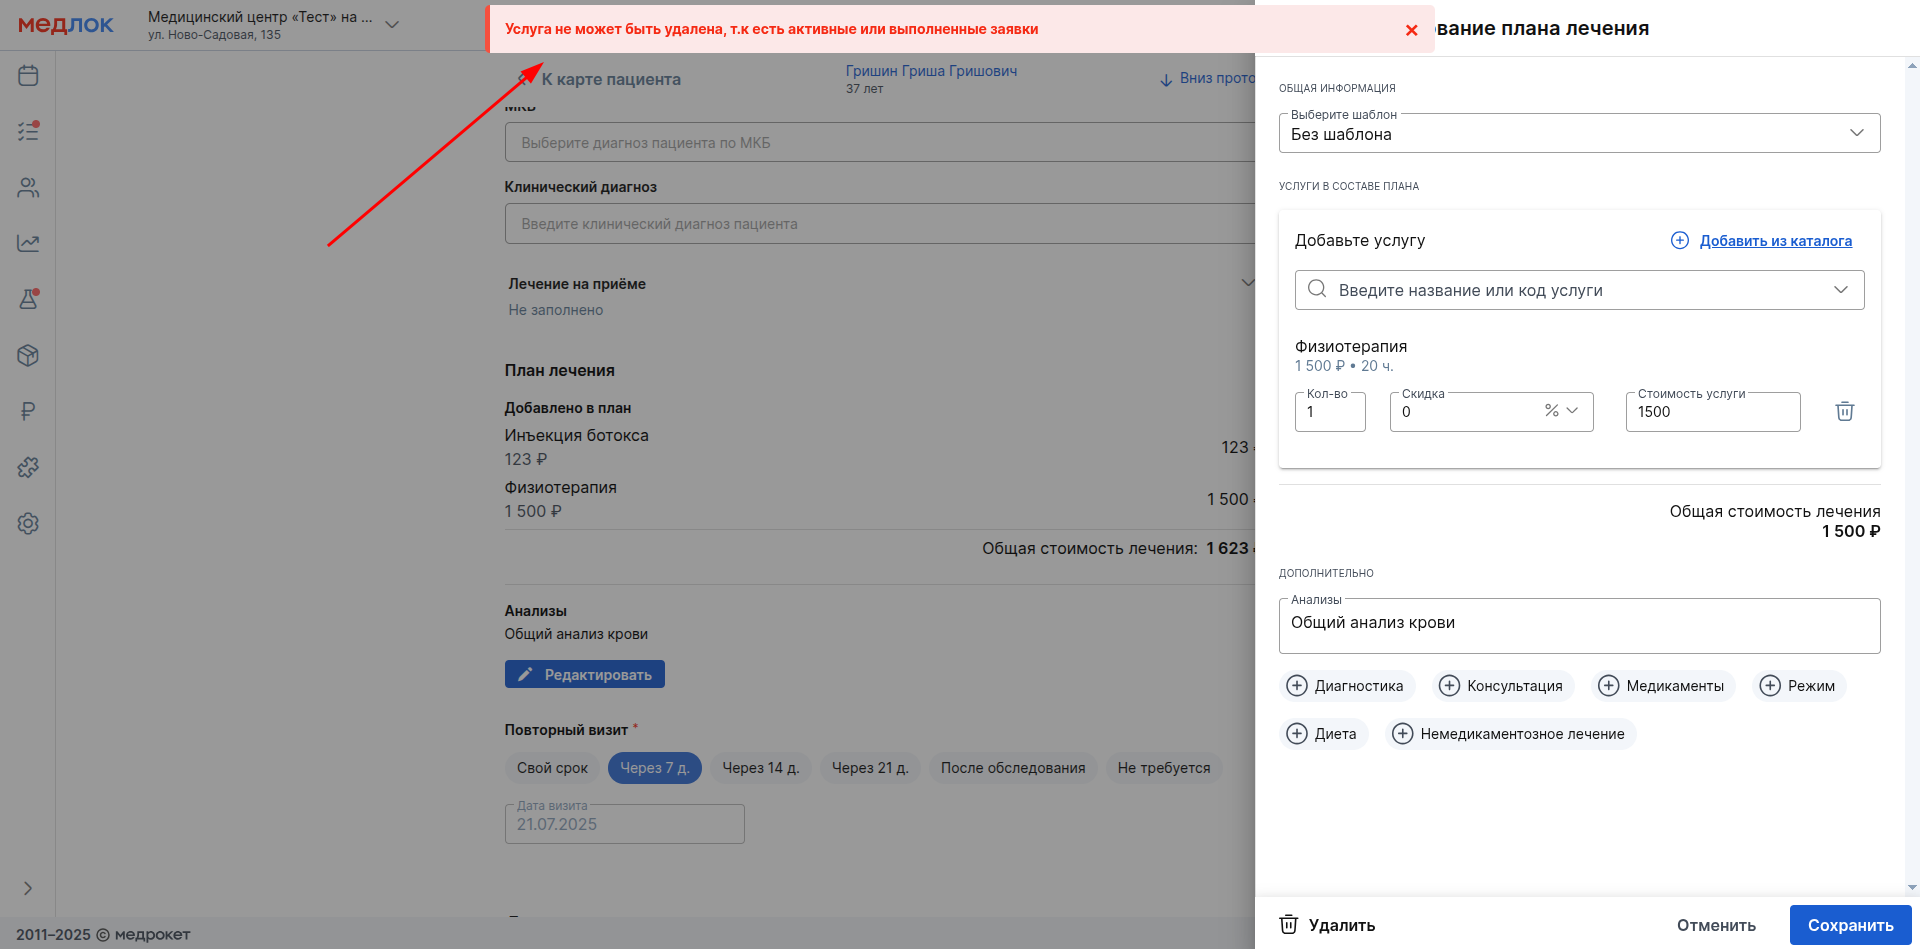
It is important that in the patient's profile you can always remove the service from the treatment plan that was created from this protocol. But the changes in the treatment plan will not be transferred to the protocol.
You may be interested in an article about working with the section«Пациенты».