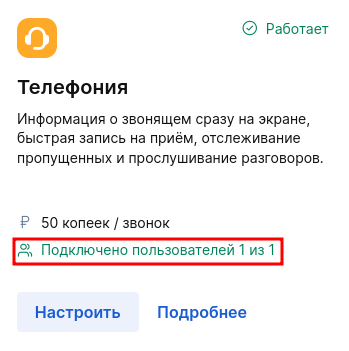
The module «Телефония»synchronizes the medlock with calls coming in and out of the clinic. So the administrator can see the full name of the calling patient, which is in the clinic's database on the monitor screen, go to his card or make an appointment. The module «Телефония»also saves the call history to the Medlock.
How the module works«Телефония» 
The Medlock telephony server is an intermediate link between the clinic's telephone and its virtual PBX.
Example: the login and password of the clinic administrator, which are used in the virtual PBX and connected to the landline phone, are specified when the module is connected «Телефония»to the Medlock. Thus, the Medlock telephony server connects to the clinic's virtual PBX and syncs with it.
If an incoming call is received on the administrator's landline phone, this administrator will see the caller's card in the Medlock. At the same time, it is important that the administrator is logged in to Medlock using his username and password, and also selects the phone he is working on in the current shift. To answer the call, the administrator needs to pick up the phone.
Important! For telephony to work in Medlock, 1 login (SIP account) must be connected to 1 device (IP phone or softphone).
Virtual PBX operators that MEDLOCK integrates with:
- Mango.
- Telfin.
- UIS.
- Rostelecom.
- Megafon.
- Beeline.
- MTS.
- <url>
- Business network.
- MTT.
- A new phone.
- By Tattelecom.
- MCN Telecom.
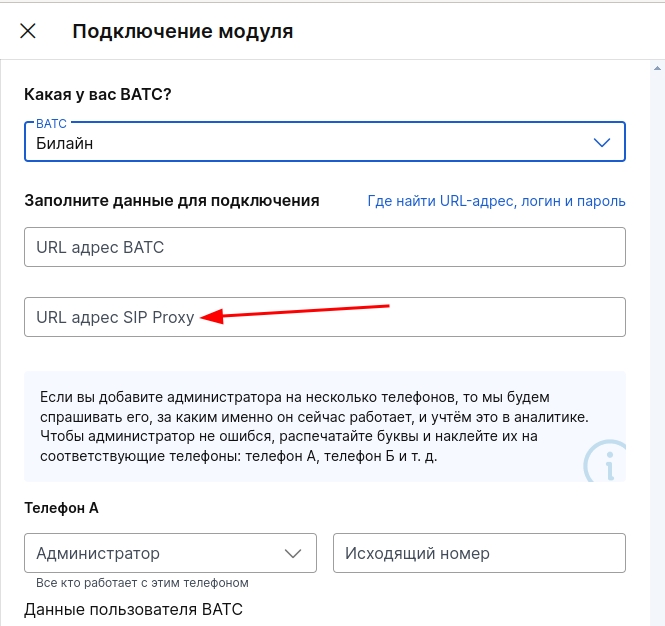
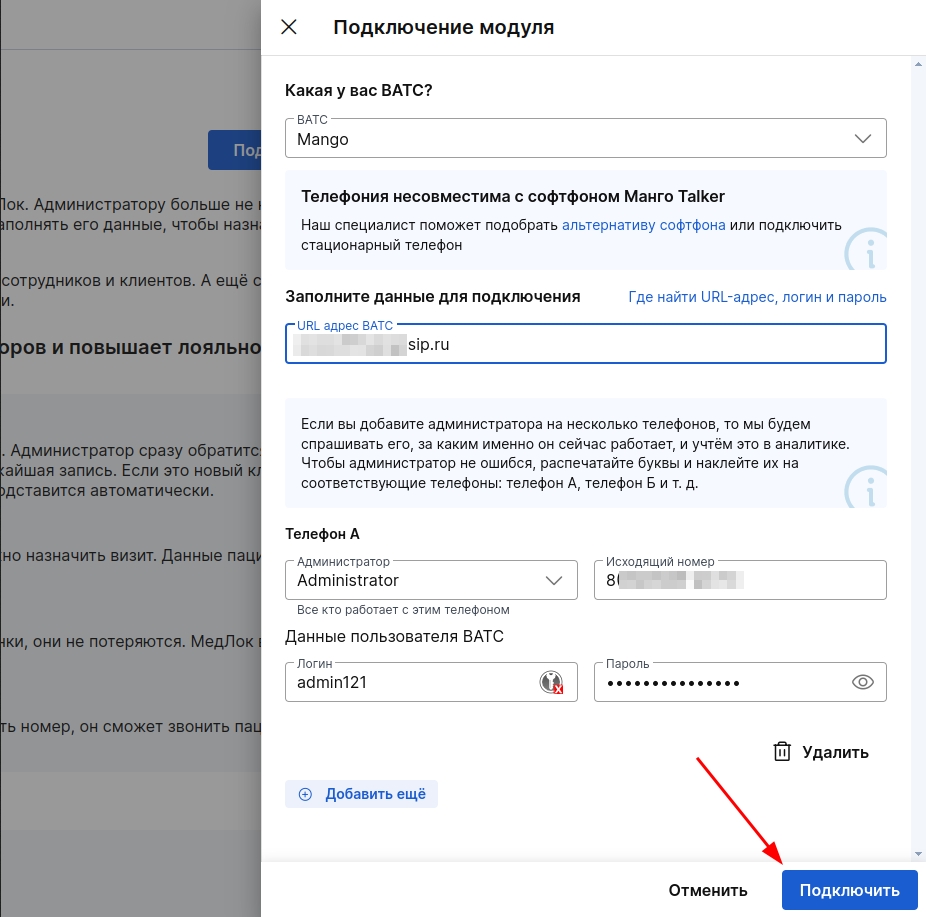
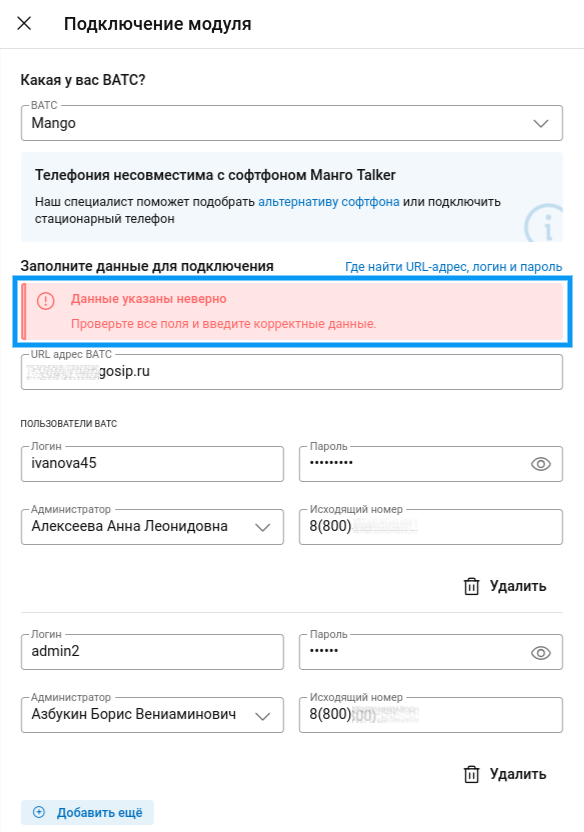
Important! Telephony is not compatible with Mango Talker softphone. Our specialist will help you choose an alternative softphone or connect a landline phone.
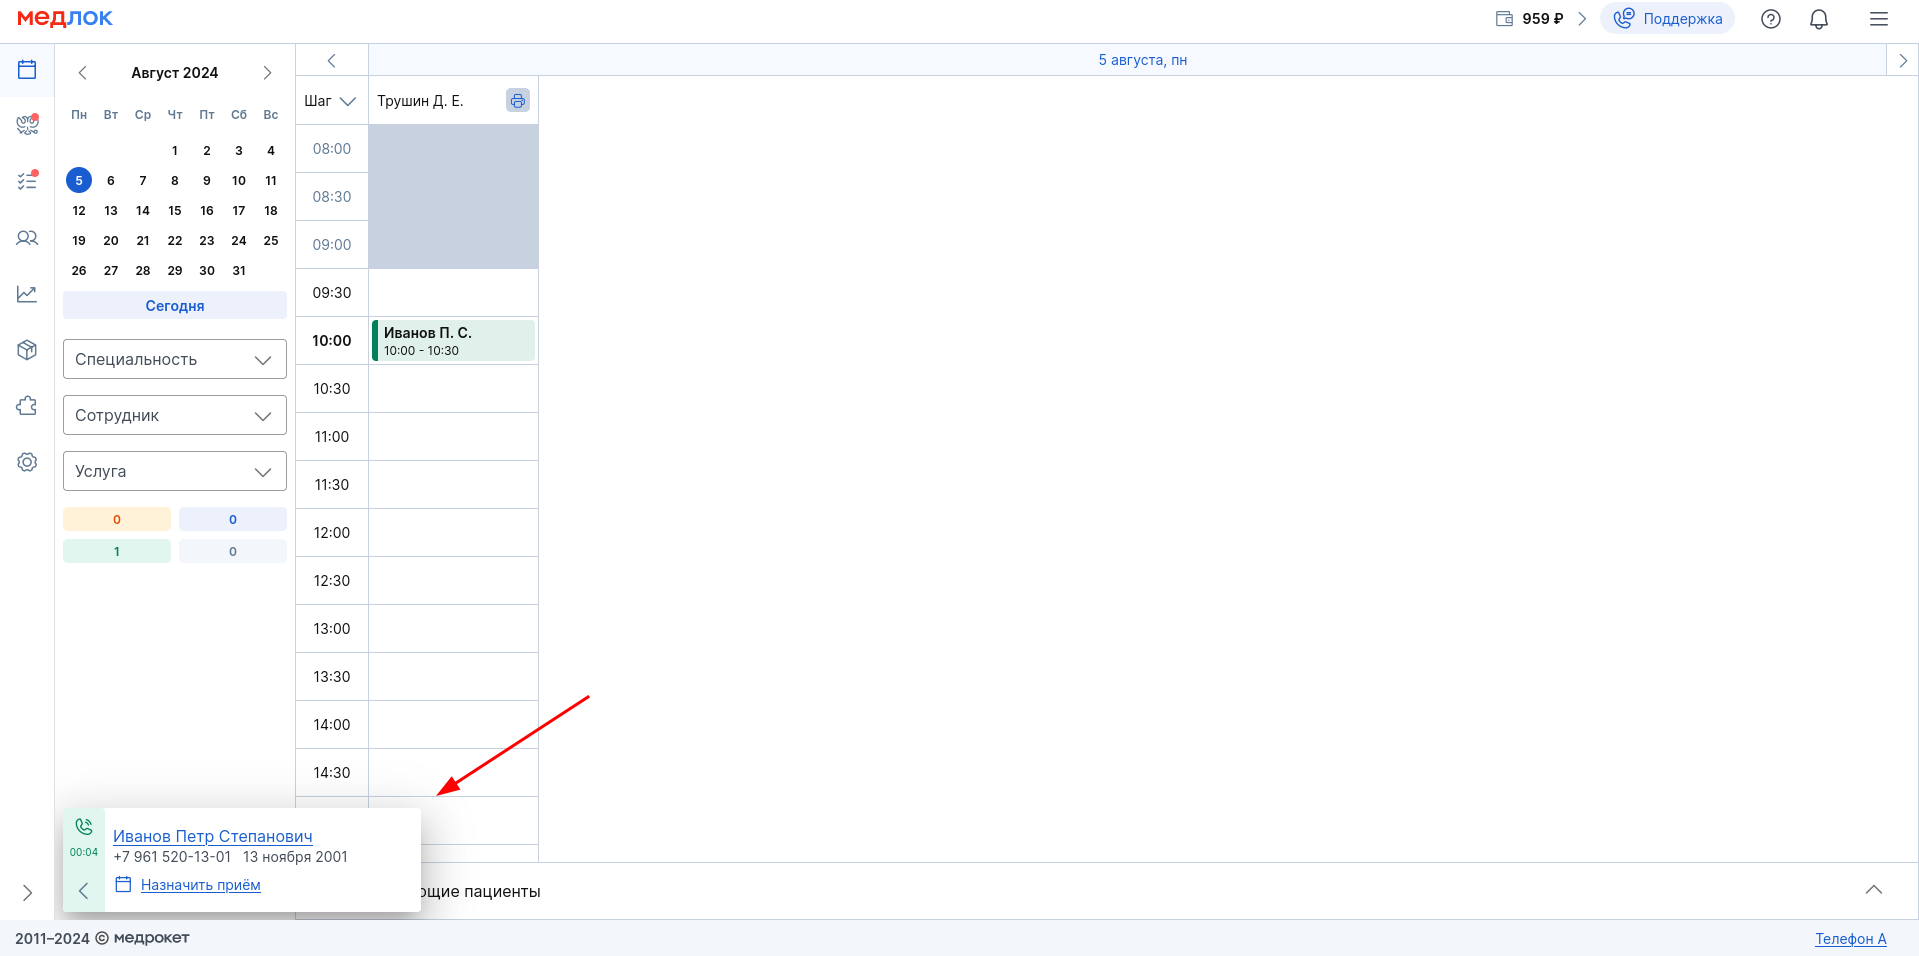
This is what an incoming call from a patient whose data is already in the clinic's database will look like.
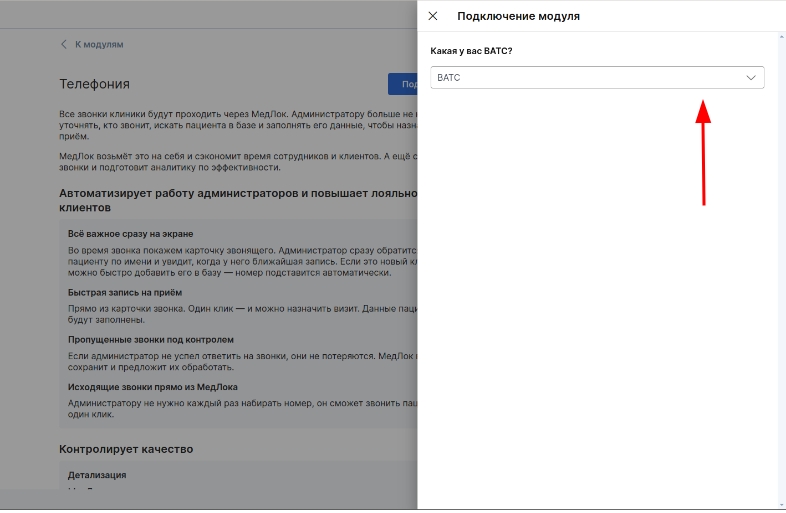
How to connect«Телефонию»
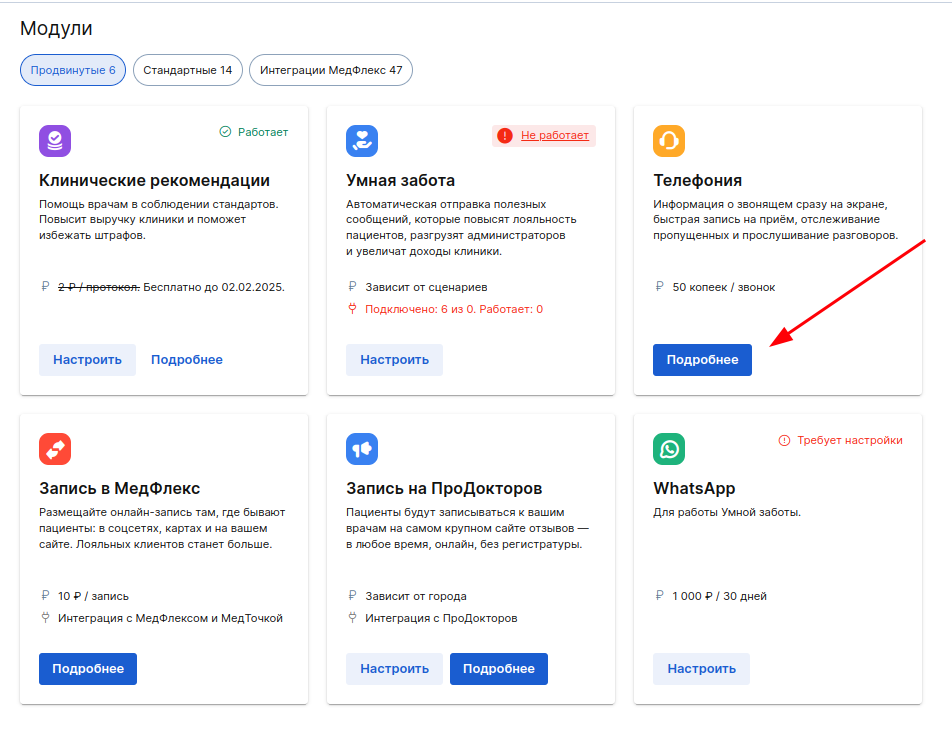
- Go to the section - the card - the button .«Модули»«Телефония»«Подключить»
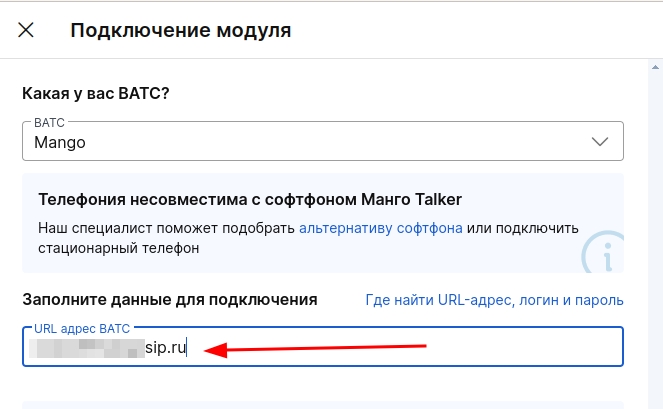
2. The side menu opens. Select your VTS operator from the drop-down list.
3. Specify the URL of your WHATSAPP.
Instruction manual: Where to find the URL, login and password in the WHATSAPP.
If your provider is Beeline, you also need to specify the SIP Proxy URL.
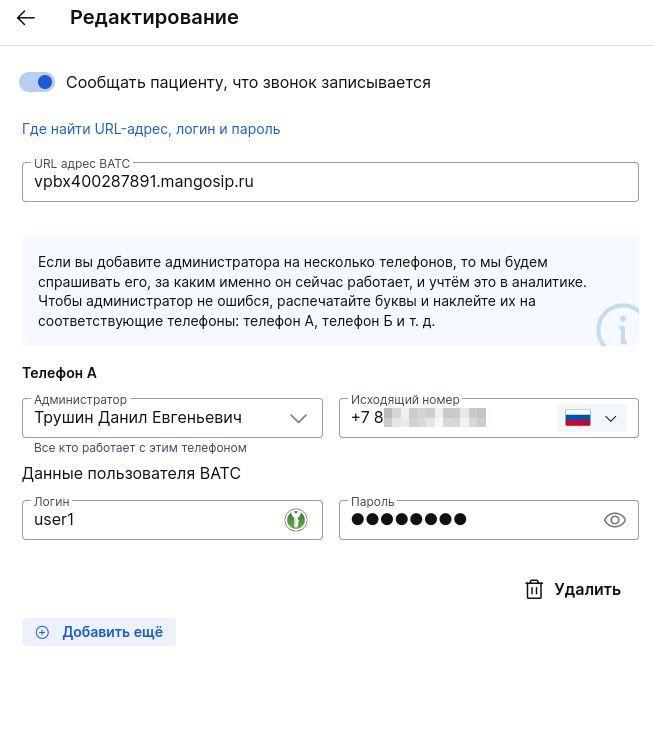
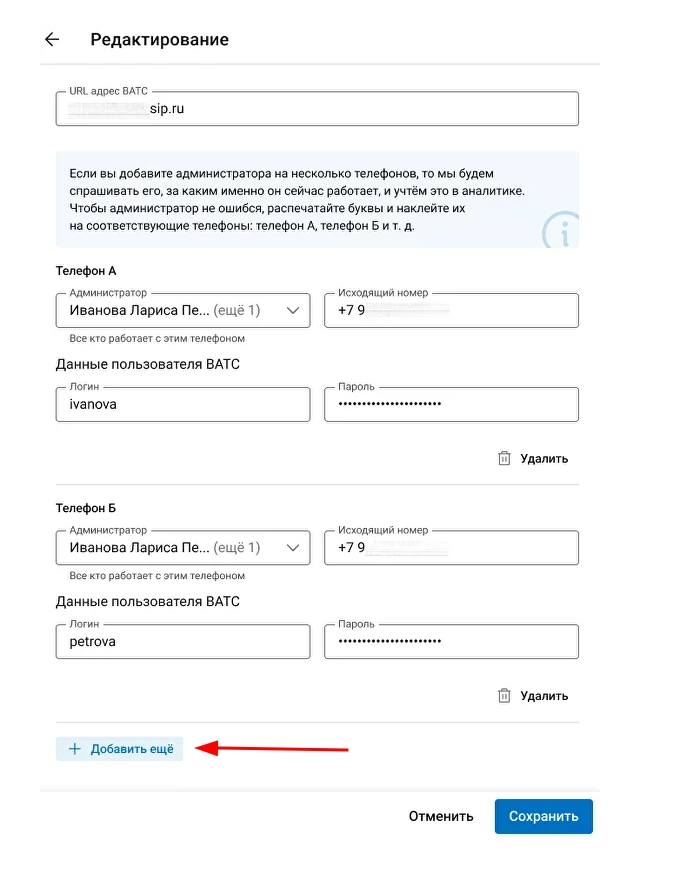
Enter your phone number and:
- the login from the WHATSAPP account that is specified in the phone.
The VTS can provide an account login in the form of login@domain.WATTS. Please note that you need to enter exactly the username that is specified before the "@" character. - administrators who can work on this phone.
- The outgoing number that patients see when they receive a call from this phone.
If you can't find your username and password, you can check with the operator's support service.
As a result, you should receive as many records«Телефон А», «Телефон Б»etc., as many handsets as the clinic administrators have at their disposal.
Each administrator who works with a phone in the current work shift must have his own handset.
This is necessary for the formation of correct analytics on the work of administrators with telephony.
If you can't find your username and password, you can check with the operator's support service.
4. Make sure that the employee you want to add has access to edit the schedule and patient database. Otherwise, his full name will not be on the list of employees to connect telephony.
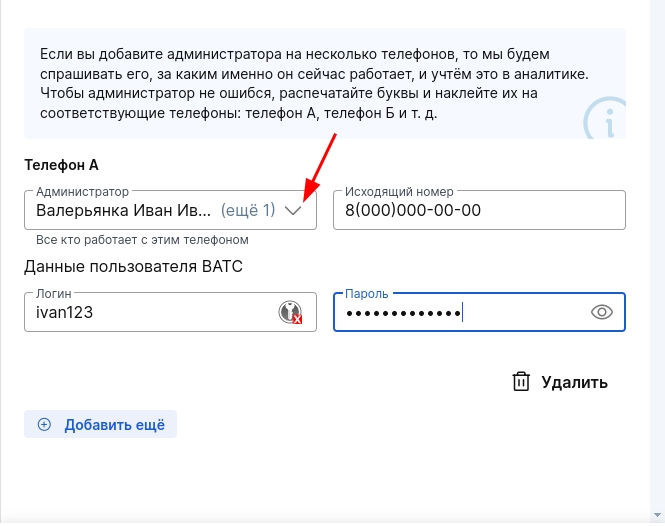
5. If you need to add a separate username and password, click «+Добавить еще»and fill in the details for the next employee.
6. After you have entered the details of all users, click «Подключить».
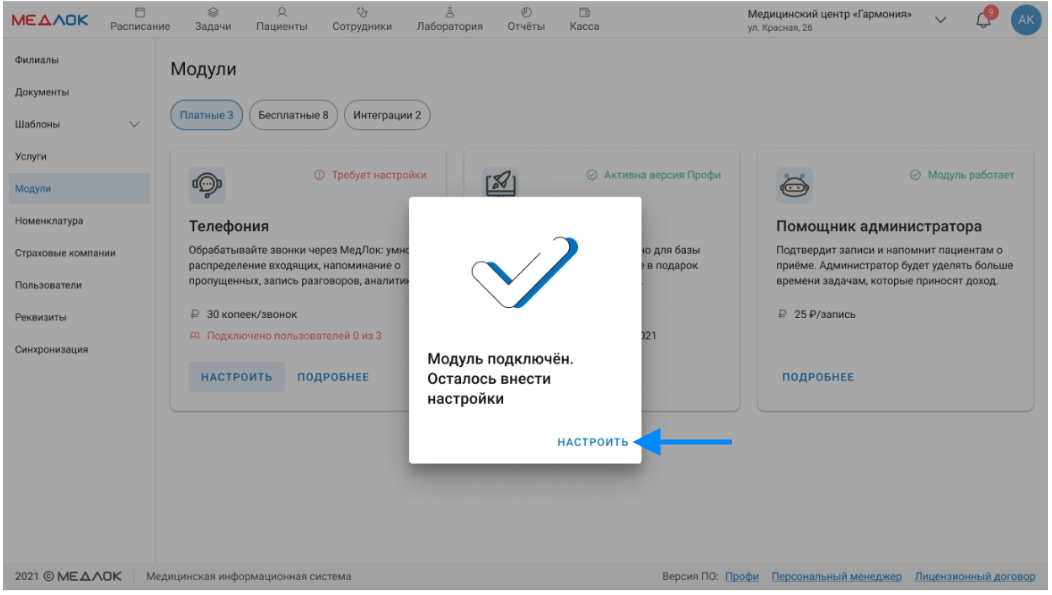
Do not switch to other tabs in the Slow Lock and do not reload the page until the download is finished. The system searches for users and creates a configuration for connection.
7. If the search and configuration creation were successful, go to configuration.
8. In the settings, you will see your VTS and the entered data.
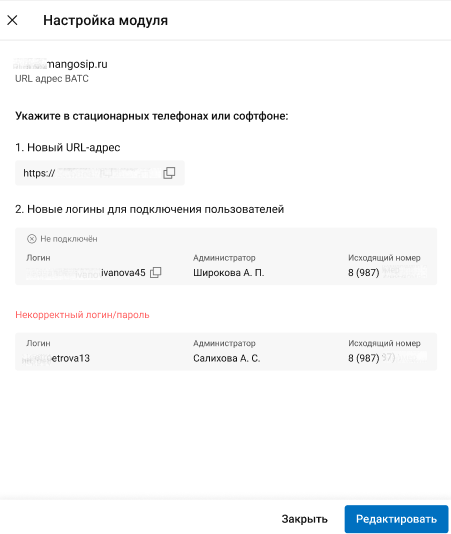
9. In the settings of all landlines/softphones, you must specify:
10. New URL.
11. New user logins.
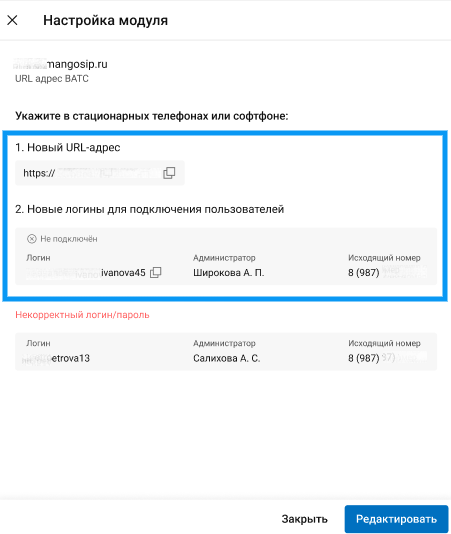
*Setup at this stage should be done on a landline phone/softphone.
You will not be able to enter this data in the VTS settings.
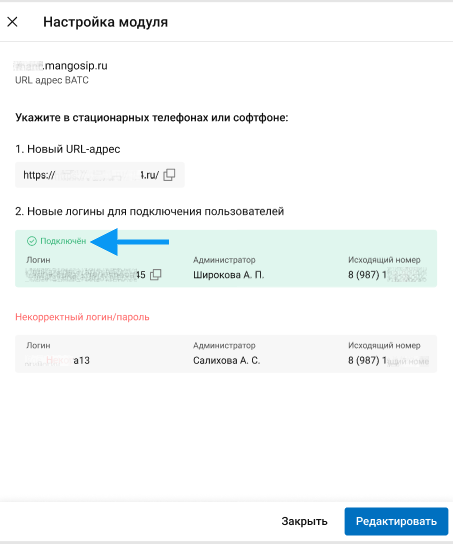
When you finish the settings, the status will be displayed in the Medlock next to the user's data«Подключён».
Connection statuses and errors
The error occurs if no user could be found based on the specified data.
Check the URL, usernames and passwords, then click again«Подключить».
If it is indicated on the module card«Требует настройки», then the module is not working. You need to make sure that you have followed all the connection instructions.
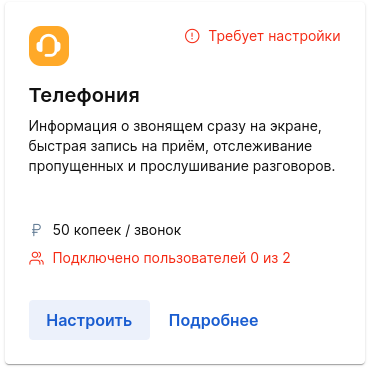
If at least one of the users you specified is found and successfully connected, the status will be displayed on the card«Модуль работает». It is specified below exactly how many users are connected.